Uninstall OneDrive from Windows 10 in 2017
OneDrive is that pesky neighbor that keeps showing up when you don’t want them to. Microsoft keeps trying to push their various services down everyone’s throat without any easy method to get rid of it until now. In late 2016 and early 2017 an update to Microsoft Windows 10 makes it so you can easily uninstall OneDrive from Windows 10. It only took them two years to finally give users an option to get rid of an annoying popup that everyone manually disables through the registry editor.
The new method to uninstall OneDrive still isn’t perfect though, it leaves behind a lot of artifacts, such as the OneDrive folder still appearing when opening and saving files. And inside of the File Manager (explorer), OneDrive still appears on the sidebar without any icon.
To completely remove OneDrive inside of Windows 10, follow the steps below for the most complete method to permanently remove OneDrive.
Uninstall OneDrive
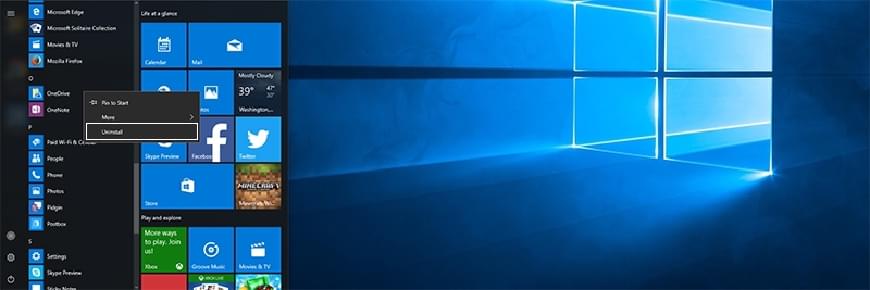
It’s now possible to uninstall OneDrive (partially) through normal means through the “Programs and Features” menu, the “Apps & Features” app, or by right clicking on the “OneDrive” in the start menu.
- Open up either “Apps & Features” or “Programs and Features” through the control panel.
- Scroll through the list until you find “OneDrive” or “Microsoft OneDrive.”
- Click on “Uninstall” and follow the various prompts that appear.
Removing Artifacts
Now that OneDrive is uninstalled, there are still some small things that need to be modified to get rid of the pesky OneDrive folder that keeps appearing inside of the file manager windows.
- Open up the registry editor. You can do this by searching for
“regedit” or by pressing
Windows + Rand typing “regedit” into the dialog window that appears. - Navigate to the key (inside of the registry folders are called keys)
located at
HKEY_CLASSES_ROOT\CLSID\{018D5C66-4533-4307-9B53-224De2ED1FE6}. While viewing a key, if you start typing the registry will scroll to the keys that match what you previously typed making it easier to find items in long lists. - Right click on the key
{018D5C66-4533-4307-9B53-224DE2ED1FE6}and rename it to have two dashes at the beginning of the name. This should disable the key while still making it easy to fix if anything goes wrong in the future. - Repeat steps 2 and 3 but for the key located at
HKEY_CLASSES_ROOT\WOW6432Node\CLSID\{018D5C66-4533-4307-9B53-224DE2ED1FE6}.
Restart
Now you need to restart your computer for the changes to take place. Sometimes restarting the explorer process is enough if you don’t want to restart your whole computer, so for those who know how to, that’s an option, otherwise just restart your computer.