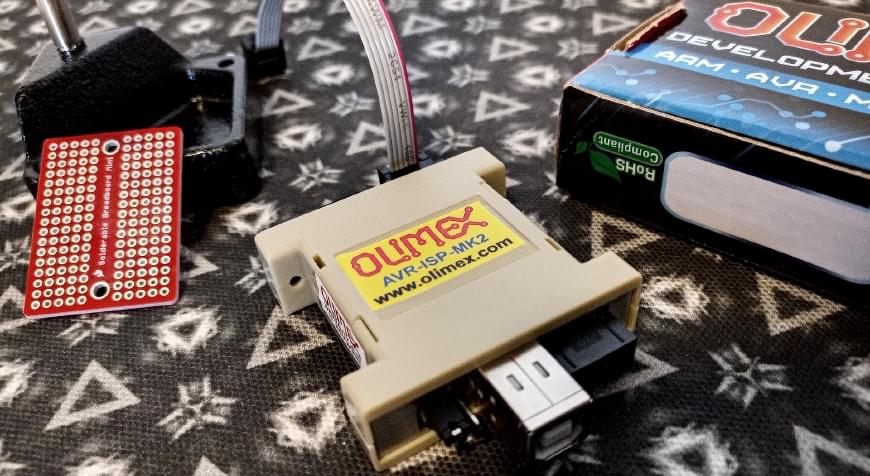
Using Olimex with AVRDUDE in Linux
Using the Olimex AVR-ISP-MK2 with Linux and AVRDUDE can be frustrating the first time as the configuration process requires you to apply patches, update firmware, build a patched version of AVRDUDE, and modify your udev rules.
This post will go through the entire process. I recently had to undergo this process, and some of the information available is now outdated. Hopefully, this article will help you solve some of the problems you faced while attempting to get Olimex to work with AVRDUDE.
The Olimex manual1 has information about this process, and using it alongside this article could be helpful.
Updating Olimex Firmware
The first step is to update the Olimex firmware. The firmware differs between Linux and Windows, but flashing the device is straightforward.
You’ll need to install dfu-programmer2 and acquire the firmware files from Olimex3. The firmware file you want is “libUSB-AVRISP-MKII.hex” if you’re using Linux and AVRDUDE. The program dfu-programmer is available in the Debian and Ubuntu repositories.
Plug your Olimex AVR-ISP-MK2 into your computer, and then with a pin (a SIM card eject pin works well), press the “RESET” button on the device. The LED should power off once you press the reset button.
Once reset, run the following commands. After running the below commands (which takes a second), you can unplug and plug your Olimex device.
# dfu-programmer at90usb162 erase
# dfu-programmer at90usb162 flash --debug 6 libUSB-AVRISP-MKII.hex
Creating Udev Rules
Linux uses Udev4 to manage devices within the system. When you plug in a USB device, it’ll create a device node in /dev with the appropriate permissions. Unless you modify the Udev rules, the Olimex device will have the permissions 600, and you won’t be able to program your devices unless you’re root.
Create a new file in /etc/udev/rules.d called 60-avr.rules with the following content. The 60 denotes the loading order of the rule files.
SUBSYSTEMS!="usb_device", ACTION!="add", GOTO="avrisp_end"
# Atmel Corp. JTAG ICE mkII
ATTR{idVendor}=="03eb", ATTR{idProduct}=="2103", MODE="660", GROUP="dialout"
# Atmel Corp. AVRISP mkII
ATTR{idVendor}=="03eb", ATTR{idProduct}=="2104", MODE="660", GROUP="dialout"
# Atmel Corp. Dragon
ATTR{idVendor}=="03eb", ATTR{idProduct}=="2107", MODE="660", GROUP="dialout"
LABEL="avrisp_end"
The Udev rules are applied once you restart the Udev system or your computer. Run the following command to apply the rules without restarting.
# udevadm trigger
The first line checks if we’re adding rules for the USB subsystem. Otherwise, we skip the defined rules. The next lines match the idVendor and idProduct to our USB devices and modify the mode and group for the device. When a device matches both attributes, the device is created with the group dialout and the permissions 660. Be sure to add yourself to the group.
# usermod -a -G dialout <USER>
You can find the idVendor and idProduct values of devices by running the command lsusb.
If you continue running into permission issues with your device, you can use udevadm for debugging.5 Use the below command to get information about a specific device by its bus and device number (determined from the output of lsusb).
# udevadm info -a -p $(udevadm info -q path -n /dev/bus/usb/<BUS>/<DEVICE>)
Patching AVRDUDE
Since AVRDUDE 6.0.1 there has been an incompatibility issue with AVRISP-MKII. A patch6 exists, but you’ll have to apply it yourself and build the software instead of installing it through your operating system’s package repository.
Ensure that you have uninstalled AVRDUDE if you previously installed it through your package manager. If you want to keep both versions, when you compile AVRDUDE you can modify the PREFIX to install the compiled version to a different location.
Downloading Dependencies
You’ll need the following software to build AVRDUDE. These are all provided by your operating system’s package repository. You’ll also need to download the source code for AVRDUDE7 and the patch6.
- bison (yacc replacement)
- flex (lex replacement)
- build-essential (gcc, make, libc-dev, etc)
- libusb-dev
- libusb-1.0-0-dev
- libelf-dev
Apply Patch to AVRDUDE
Applying the patch to AVRDUDE is easy. Before you compile, run the below command to apply the downloaded patch to the AVRDUDE source directory.
$ patch -d avrdude-6.3 < endpointdetect_pass1.patch
Building AVRDUDE
Now that it’s all patched and our dependencies are installed we can build AVRDUDE. Run the commands below. Look at the file INSTALL for additional help if anything doesn’t work as planned.
$ ./configure
$ make
# make install